Friday, November 25, 2011

11 25 Rear Mud Guard Spray


I will soon begin to put back all the plastics onto the bike, but b4 that, I still got 1 last thing to spray - the monokey rack and bracket.

Wednesday, November 23, 2011

11 21 Bandit Clutch Plates Remove


remove clutches, 8 Frictions plates and 7 pressure plates.


The part number on the part manual are not consistent.

For e.g., the same part that is used on different bikes have different part number.

When self purchasing part, be ready to accept a different part umber and use it as long as the part looks exactly the same.  Should not follow blindly the part number or you will have endless argument at the parts counter with the agent staff.

All 8 plates in, push rod canot reach pressure plates, use 7 plates and push rod perform push well, clutch play is smooth. I try to use all 8 plates and add a washer to reach pressure plate, but then the spring gets compress too much and clutch is too heavy.

Used 7 plates and keep 1 plate as spare.

Friday, November 18, 2011

11 18 Wash Carb and Ride GN to Kota Tinggi

Service Carb of Gn yesterday and mend the manifold with Sealant.

Installed the tank and seat today.


Ride GN to Kota Tinggi, managed to rush back to JB b4 it rains.

Tuesday, November 15, 2011

11 15 Clutch Cover down and Painted radiator Wall

 painted the radiator wall
 Clutch cover down to get ready to start work on the clutch.


Monday, November 14, 2011

2011 11 14 Rubber Cover for Spark Holes


Got a piece of hi temp industrial rubber mat at S$10 (standard size) size to custom make my
spark plug hole cover to prevent water from entering.

I use less than half of it.  Interested party can get the other half from me at S$5.

Sunday, November 13, 2011

2011 11 13 Coolent Fan Switch and Headlight Off-On Switch

I have only 1 pc of 2 dollars sim lim tower switch in my inventory.

I used it for the coolant fan.

I lay the wire for the headlight on-off switch circuit, I will buy another switch from Sim Lim and fix it later.

Friday, November 11, 2011

2011 11 12 Bandit Engine Up and Running

Get my manifold mended, the engine runs like silk.

NEXT, CLUTCH PLATE........!!

Thursday, November 10, 2011

2011 11 09 Intake Manifold Glued


I glue the leak with Industrial Hi- Temp sealant and waited for 2 days for it to be completely dried.  as you can see, I applied a very thick layer outside and I also applied a very thin layer on the inside in the groove between the rubber and the metal.  I want to make sure that it is completely dry and harden and stick before I run the engine again, no glue should be suck in to the valve by the engine vacuum, or it may block the valve.

Wednesday, November 9, 2011

2011 11 09 Intake Manifold and rear Fender

There is a leak at the joint of the no. 3 intake manifold.


I will try to repair the leak by using hi-temp industrial automotive glue.


The rear fender will be washed today and will eventually be sprayed painted black, I took pictures of the decals 'Bandit' in case I need to make them later.

Saturday, November 5, 2011

2011 11 05 Bandit Carb and Air Box Fitted

One consolation I get from today's work is - the spark plug cables need not be changed.
----------------------------------------------------
Video before I fitted the stuff:


I fix in the air filter and carburettor back to the bike.

When the design of the carb is bad, the toughest part of fixing the carb is to insert the head tip of the throttle cable into the groove in the carb.  this process took a full 40 mins for the bandit.


I remember that in my TDM850, I got so frustrated in fixing the throttle tips that I reduced the throttle cables
form 2 to 1, I give up on the retractor cable because I cant fix it in, I only use the the acceleration cable from that point on.  The retractor cable is still in my store afer I sold the TDM.  I have tested the TDM thorughly with the single cable, it works just fine, went for numerous trip with the bike.


Troubleshooting steps start here - I m keeping my finger crossed as I press the ignition:

start button - cranking but no start.

unscrew  carburetor drain screw and see that petrol drip -> got fuel

take out spark plug to see the tip , looks like no spark b4.

ingition button press with spark plug connected but hold in cloth by hand, no spark.

press for a few second and smell petrol from the spark plug hole.  - got a/f mixture supplied to engine cylinder.

[at this state, i am starting to panic]

i think problem should be electrical, check all wire connection again.

1 green/black wire on the left side unplug, but i remember this wire was unplug in the
original state when I remove the air box and carb.

open fuse cap check ignition fuse is connected i.e. not blown.

put back the fuse and cap  and press start again, it starts.

the bike now ref better than before, looks like the new spark plug helps.

There is white smoke with a 'spark' sound from cone 3 connecting carburetor and engine.,

I think there may a leak in cone 3 as I can see black oil underneath the cone.

That means I need to take the air box and the carb out again to examine.


If there is a crack in the cone, I see cone 2 and 3 got oil below, no wonder this area behind the
engine had a forest of oil, grease and dirt.  Should I:


- mend the crack with industrial sealant  or


- buy a new cone.


These are qns going on in my mind.


Industrial sealant -> cheaper but may also be reliable.  


When David Goh rebuild his GSX1100G he 
used the sealant. 


 http://www.reocities.com/MotorCity/Pit/8858/gsx1100g/g.htm


new cone -> cone 2 to 4 do not have breeder hole for synchronisation, they are cheaper cones (low cost) that was fitted by previous owner.  Should I use new cone to allow for carb syn. process ??


Do the carb need to be synchronised at all. ??  May not be if acceleration is smooth.


I will perform further test to gather more info. 


Friday, November 4, 2011

2011 11 04 Bandit Fuel Cock, Spark Plug and GN Rear Sprocket

I successfully changed the GN rear sprocket from 41 to 38 today, first ride impression, miss the torque but this is the way I wanted her to be after much consideration.  It cruise at 90 km/h with 5k+ rpm.  I now can have the patience of mind to spend more time to fix the bandit as i can take/use the GN to Johor for some casual ride at
hw speed.

To change the rear sprocket:

It is not enough to just drill holes, got a sprocket from another model so need to mod, there is a process call sprocket balancing which involve drilling the holes at the right spot so that the centrifugal force is balanced when it rotate at high speed. The central shaft hole of the sprocket also need to be enlarge which require the use of a lace machine.

The original standard spark plugs of the bandit is U24 ETR / CR8EK, it is already memorised after asking so many shops for this plugs.  This plugs has 2 'heads'. No body seems to carry them and if they do, they quote me a bomb.  Many says only some rear Suzuki bikes use this(they may be right), so they recommend use this and that type which they have at that time,  moments like this is when I have to make tough decision.


I got the NGK Platinum G Plug instead.


After some research, I settle on NGK G Plus for its value / cost rating.
It does not come cheap, I think the days in 2009 where I bought s$2.80/plug - DPR8EA-9 at Auto Machinery for my TDM 850 is over, these days will never dome back, 1 NGK plug now cost at least S$5.50 due to high Yen Value and high Inflation.


The rubber that is mounted on the chassis still looks new after 18 yrs on the road, originally, I want to give it a spray of paint but then I just decided no need.

Thursday, November 3, 2011

2011 11 03 GN250 Sprocket and clean bandit fuel cock

Jeffrey quote me $70 for the whole job of modify GN front sprocket.  Need to leave the bike there early in the morning and maybe can take it in the late afternoon.  I know that the cost of sprocket is probably S$15.

Ask 5 JB Bike shop, the first shop, my regular nearest to Custom besides the money changer, says 'sure, I got a 39 teeths for Rm35. This is the reply from the boss my regular mechanic is not around as it is early morning.  His Indian mechanics go ahead to remove my rear wheel, when he is about to instll, he says.
"it looks strange, what, this is not a GN 125, it's a GN 250, its using bigger chain.  ANyway, regarding the TT100 tyres, they install the right rotation for rear wheel in front, I ask them to take out the front wheel to rotate the tyre and install again.  

GN 250 uses 520 chain , unless I change the whole set with the front sprocket and chain."

2nd -4 th bike shop all says that they dun have that sprocket.

The 5th shop YI TAKT Motor Enterprise at:
No. 8C, Jalan Susur 3, Off Jalan Tun Razak, 80200 Johor Bahru, Johor

It has a 1983 GSX 1000 Naked bike being rebuild in the shop.

Says the boss is out sourcing for parts and they take pictures of the sprocket
saying that there is a chance that they may have.  So I will wait for their call.


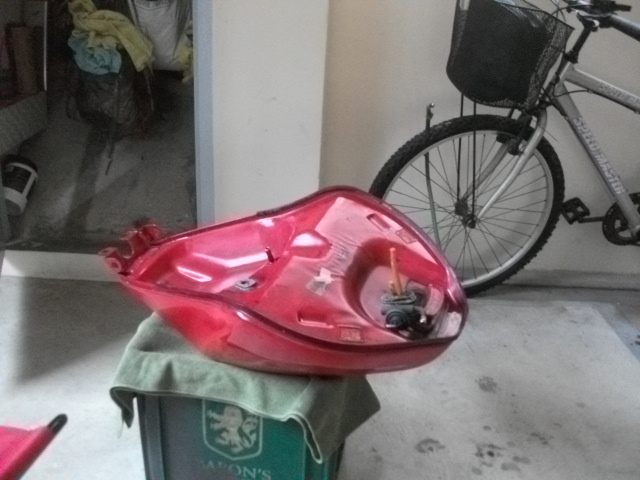
Washing the fuel Cock from the Bandit Tank


this is the dirt from the tank that I drain out.


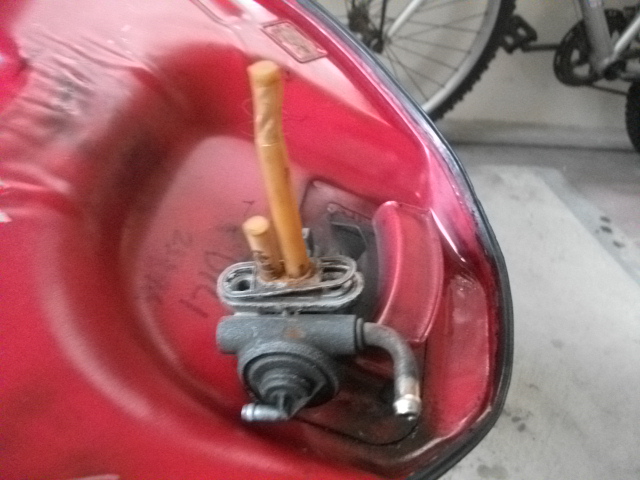
the fuel cock I need to take the picture of the main and reserve petrol filter before I pulled them out because
if I insert wrongly during installation, the main will become reserve and vice versa.


I poured some diesel into the tank, shake it and drain out the diesel several time to clean the interior thoroughly.

Now I am contemplating:

1.  to use back original fuel cock with air actuated valve, meaning it need to connect a tube from the carburettor cone to 'blow air' into the cock to let the fuel flow.

2. Get a simple , cheap fuel cock and use gravity flow to feed the carburettor, I  can turn off the fuel tap whenever I dun use the Bandit.


Tuesday, November 1, 2011

2011 11 01 Painting the Bandit Chassis

decide to paint the chassis of Bandit today.

I try on the back part of the chassis - will be hide by the fender first to see how is the effect.

The first few Brush is not to my expectation but I went on to paint, when it is completed, it turn out to be quite nice.


The red paint is strong, I need to use more diesel to wash the brush then other paint that I used before.

Sunday, October 30, 2011

Pictures of my GN 250 1 Nov 2011


Ride the GN to Masai via Hw E22 this morning.
Took a Yong Tau Hu Lunch in Masai, did not bring camera so no Picture.

GN can cruise at 80 km/hr now , RPM is 5+ K at 80 km/hr.
I will try to change the sprocket ratio to increase the top end cruising speed.  


Saturday, October 29, 2011

Washing the Bandit Carburetors

I do not have air gun or compressed air.
I need to let the carb pasts dry naturally.

I put it outside my house for 2 days for drying.


I will do my best to clean up the engine area under the carb.


I need to take the picture of the carb needle to know the order to insert the spacer and stopper.
If the order is wrong, the float will not work well and throttling will produce funny acceleration, 
it happened to my DR350 before.


Today at 2330 hrs SIN time, I finished washing the carb, air filter and assembled them.

I have repaired the old air filter by patching a piece of sponge at one corner.

Next step, I will see if I buy the spark plug CR8EK or paint the chassis.
I haven't decide which step I go for, lets see which is more convenience.